Best HDR Settings for the MSI MAG 271QPX E2
The question this answersWhere do these come from?
What are the best HDR settings for the MSI MAG 271QPX E2?
Use EOTF Boost for most HDR games, calibrate after selecting it, and switch to True Black 400 if changing scene brightness becomes distracting.
With firmware FW.026 or newer, the best general-purpose HDR setting for the MSI MAG 271QPX QD-OLED E2 is Image > DisplayHDR > EOTF Boost. Pair it with the User picture presets, 10-bit RGB output, FreeSync Premium Pro, and a fresh Windows or console HDR calibration performed after selecting the HDR mode.
Choose True Black 400 instead when you want more consistent brightness across bright scenes. Reserve Peak 1000 nits for predominantly dark games in which small lights, flames, stars, or reflections matter more than the brightness of the whole image.
The settings to copy
For a Windows gaming PC, start here:
- Gaming > Game Mode: User
- Gaming > FreeSync Premium Pro: On. Older firmware calls this Adaptive-Sync.
- Gaming > DSC: On when using DisplayPort at 2560 × 1440 and 240Hz
- Professional > Pro Mode: User
- Professional > Image Enhancement: Off
- Image > Screen Size: Auto
- Image > DisplayHDR: EOTF Boost
- MSI OLED Care: Leave the protection features enabled at their defaults
- Windows resolution and refresh rate: 2560 × 1440 at 240Hz
- GPU output: RGB, Full dynamic range, 10 bits per color
- Windows Use HDR: On for HDR games and video
- Windows Auto HDR: Off for games with native HDR; optional for SDR-only games
- Windows HDR Calibration saturation: 0 initially
- In-game paper white: Start at 200 nits
The E2 is the 240Hz model. Do not install firmware intended for the similarly named 360Hz MAG 271QPX QD-OLED. MSI’s manual confirms that the E2 accepts 2560 × 1440 at 240Hz over HDMI 2.1, DisplayPort 1.4, and USB-C DisplayPort Alt Mode. If the model names are causing confusion, the site’s MSI 27-inch QD-OLED comparison separates the variants. MSI MAG 271QPX QD-OLED E2 user guide
Which DisplayHDR mode belongs in each game
| DisplayHDR mode | Best use | What it prioritizes | Requirement |
|---|---|---|---|
| EOTF Boost | Mixed bright and dark HDR games | Higher brightness at the same average picture level | FW.026 or newer |
| True Black 400 | Bright games and consistent output | Brighter large areas with less distracting scene dimming | VESA True Black 400 mode |
| Peak 1000 nits | Horror, space, caves and night scenes | Highlights up to 1,000 nits when roughly 3% of the image is bright | Low-average-brightness scenes |
EOTF Boost is the default choice now. MSI says it produces greater brightness than both True Black and Peak 1000 under the same average-picture-level conditions. The option is located at Image > DisplayHDR > EOTF Boost. It was added after the printed manual, which is why older documentation lists only True Black 400 and Peak 1000. MSI’s EOTF Boost instructions and MSI’s HDR mode explanation
True Black 400 is the fallback for distracting brightness changes. It cannot make tiny highlights as bright as Peak 1000, but it is better suited to sunny outdoor levels, sports games, and other scenes containing large bright areas. MSI specifically recommends the True Black mode for higher-average-picture-level content.
Peak 1000 is not a universal “maximum quality” switch. MSI states that the advertised 1,000-nit output occurs at about 3% APL, meaning only a very small portion of the panel is bright. As more of the image becomes bright, the panel reduces output. This is why a Peak 1000 desert or snow scene can look dimmer than the same scene in True Black 400.
TechSpot’s instrumented review of the newer MAG 272QP X50 used the 271QPX E2 as a comparator and found that the X50 was 18% brighter on average in Peak 1000 mode. That comparison quantifies the older E2 panel’s bright-scene limitation, but it is not a post-FW.026 EOTF Boost measurement for the E2. No major English-language laboratory has published a complete post-update HDR brightness sweep for this exact model, so claims about EOTF Boost on the E2 beyond MSI’s description should not be treated as independent measurements. TechSpot’s HDR measurements and comparison
An independent exact-model test published by Sina measured 251 nits at maximum in SDR, average color error of ΔE 1.38, and gamma close to 2.2 in the default mode. Those are SDR measurements, not HDR results, but they support leaving gamma and color-temperature alterations alone rather than copying another owner’s RGB values or ICC profile. Panel-to-panel differences make borrowed white-balance settings especially unreliable. Sina’s MAG 271QPX E2 measurements
Update the firmware before calibrating HDR
EOTF Boost first appeared for this model in FW.026. A firmware history tracker records FW.026 as the August 4, 2025 release that added the feature; do not assume it remains the newest version. Download whatever firmware is currently offered on the exact E2 support page, not from a forum attachment or a page for the non-E2 model. Earlier FW.022 is also important because MSI says it fixed switching between True Black 400 and Peak 1000. MAG 271QPX E2 firmware history and MSI’s firmware changelog
MSI’s official update procedure requires a direct DisplayPort-to-DisplayPort connection between the monitor and a supported NVIDIA or AMD graphics card, with no HDMI-to-DP or USB-C-to-DP adapter. Load the firmware in MSI Firmware Update Utility, select ISP, allow roughly ten minutes, then disconnect the monitor’s AC power for about one minute. Reconnect it and perform Settings > Reset > Yes in the OSD. Do not interrupt power during flashing. MSI firmware-flashing procedure
If the utility rejects the file or identifies a different model, stop rather than forcing the update. Confirm that the monitor is the 240Hz E2, download the files again from MSI’s E2 support page, and contact MSI support if the model check still fails.
Calibrate Windows in the right order
HDR calibration describes the monitor’s current tone-mapping behavior to Windows. Changing from True Black 400 to Peak 1000 or EOTF Boost afterward invalidates that relationship, so choose the OSD mode first.
- Open Settings > System > Display > Advanced display and select the MAG 271QPX E2.
- Set 2560 × 1440 at 240Hz and verify that Bit depth reports 10-bit.
- In NVIDIA Control Panel or AMD Software, use RGB, 10 bpc, and Full dynamic range. Do not use Limited RGB for a PC monitor.
- Open Settings > System > Display > HDR and enable Use HDR.
- Launch the Microsoft Windows HDR Calibration app on the MSI screen.
- For all three luminance patterns, move the control only until the pattern disappears. Do not type 1,000 merely because the OSD mode has “1000” in its name.
- Leave saturation at 0 for accurate color. Raising it is a preference, not a repair for incorrect HDR.
- Save the profile and confirm it is active for this display.
Microsoft says the app’s three patterns establish the darkest visible detail, brightest visible detail, and maximum display brightness. It also warns that monitor post-processing can interfere with calibration; using User mode with Image Enhancement off avoids that variable. Microsoft’s Windows HDR Calibration guide
Just want the recommendation?
Skip to the picksThe Windows SDR content brightness slider does not increase HDR peak luminance. It changes the relative brightness of SDR windows while HDR remains enabled. Start around 20 in a dim room, 35 under ordinary indoor lighting, or 50 in a bright room, then adjust for comfort. Microsoft recommends beginning near the default and notes that some applications must be restarted before responding to a change. Microsoft’s Windows HDR settings guide
For the cleanest desktop presentation, leave HDR off until an HDR game or film needs it. Windows key + Alt + B toggles HDR without visiting Settings. Microsoft’s Windows shortcuts reference
Set the game after Windows is calibrated
Enable native HDR in the game and run its own calibration last. Where a game offers a numeric peak-brightness field, use the peak luminance shown for the completed Windows HDR profile rather than blindly entering 400 or 1,000. Where it displays a clipping pattern, stop at the first step where the bright symbol disappears.
Set paper white or UI brightness to 200 nits as a neutral starting point. Try 150 nits in a dark room or 250 nits in a bright room if menus and subtitles are uncomfortable. Paper white controls ordinary surfaces and interface elements; it should not be raised merely to make specular highlights brighter.
Auto HDR is unnecessary when a game has a proper native HDR implementation. Enable it only for an SDR game, assess it separately, and turn it off if blacks lift or interface colors become excessive.
PS5 and Xbox settings
Connect either console directly by HDMI and choose Gaming > HDMI 2.1 > Console in the monitor OSD. Leave Screen Size on Auto and select EOTF Boost before running the console calibration. The monitor accepts 1440p at 120Hz, while its HDMI input can also accept a 4K 120Hz video timing and scale it to the 1440p panel.
On PS5, choose Settings > Screen and Video > Video Output > HDR > On When Supported, then run Adjust HDR. “Always On” converts SDR software to HDR, which is unnecessary when faithful SDR output is preferred. PlayStation’s PS5 HDR instructions
On Xbox Series X or S, enable HDR10 and open Settings > General > TV & display options > Setup > Calibrate HDR for Games. Xbox recommends a direct HDMI connection and an Ultra High Speed HDMI cable for its advanced video features. Xbox’s display and HDR setup guide
Run the PS5 or Xbox calibration again whenever the monitor’s DisplayHDR mode changes. A console calibrated for True Black 400 cannot automatically know that the monitor was subsequently switched to Peak 1000 or EOTF Boost.
Fixing the common HDR-setting failures
Brightness and contrast are grayed out: this is normal. MSI disables Brightness, Contrast, Color Temperature, Night Vision, AI Vision, Low Blue Light, Optix Scope, and PIP/PBP while an HDR signal is active. Control HDR through DisplayHDR mode and calibration, not the disabled SDR controls.
HDR is unavailable: turn PIP/PBP off. MSI’s timing table explicitly says PIP and PBP do not support HDR. Also confirm Screen Size is Auto, the source is connected directly, and Windows is extending rather than duplicating a mixed HDR/SDR multi-monitor desktop.
EOTF Boost is missing: the monitor is running older firmware. Update the E2 with the direct DP procedure, reset the OSD, and check Image > DisplayHDR again.
The Windows desktop looks gray or washed out: first verify RGB Full output. Then remove excessive saturation or third-party ICC profiles and rerun Windows HDR Calibration. If only SDR applications look wrong, adjust SDR content brightness or toggle HDR off with Windows key + Alt + B.
Bright scenes dim or pulse: switch from Peak 1000 to EOTF Boost. If the changes remain distracting, use True Black 400 and recalibrate. This is normal OLED brightness management when it follows scene brightness; a constant image that flickers without content changes deserves separate testing with FreeSync disabled.
The picture remains wrong after a reset, current firmware, a known-good direct cable, and calibration: test another input and source. Persistent corruption, flashing, color loss, or failure to enter HDR on every source cannot be corrected with another picture preset; contact MSI support for service or an RMA.
The bottom line
Two ways to do it, depending on the kit you already own:
Top pick
It depends
Cable Matters VESA Certified DisplayPort 1.4 Cable 6 Feet
Cable Matters
Useful for unstable 1440p/240Hz/10-bit HDR or a direct DisplayPort firmware-update connection, but it cannot improve picture quality when the existing cable works reliably.
Use this for a direct PC-to-monitor connection when 1440p, 240Hz, 10-bit HDR is unstable or when updating firmware. It cannot improve picture quality if the existing cable already carries the signal reliably.Available at Amazon(paid link) — opens Amazon in a new tab. Price and availability shown there.The alternative
It depends
Zeskit Maya 8K 48Gbps Certified Ultra High Speed HDMI Cable 2m
Zeskit
Useful when HDR or 120Hz handshakes fail on a direct console or HDMI 2.1 PC connection, with thicker construction that is less flexible than an ordinary short HDMI cable.
This is useful for a direct PS5, Xbox Series X, or HDMI 2.1 PC connection when HDR or 120Hz handshakes fail. Its thicker construction is less flexible than an ordinary short HDMI cable.Available at Amazon(paid link) — opens Amazon in a new tab. Price and availability shown there.
Recommended products
Ordered by how well each one fits the situations above. Each link below is a paid link.
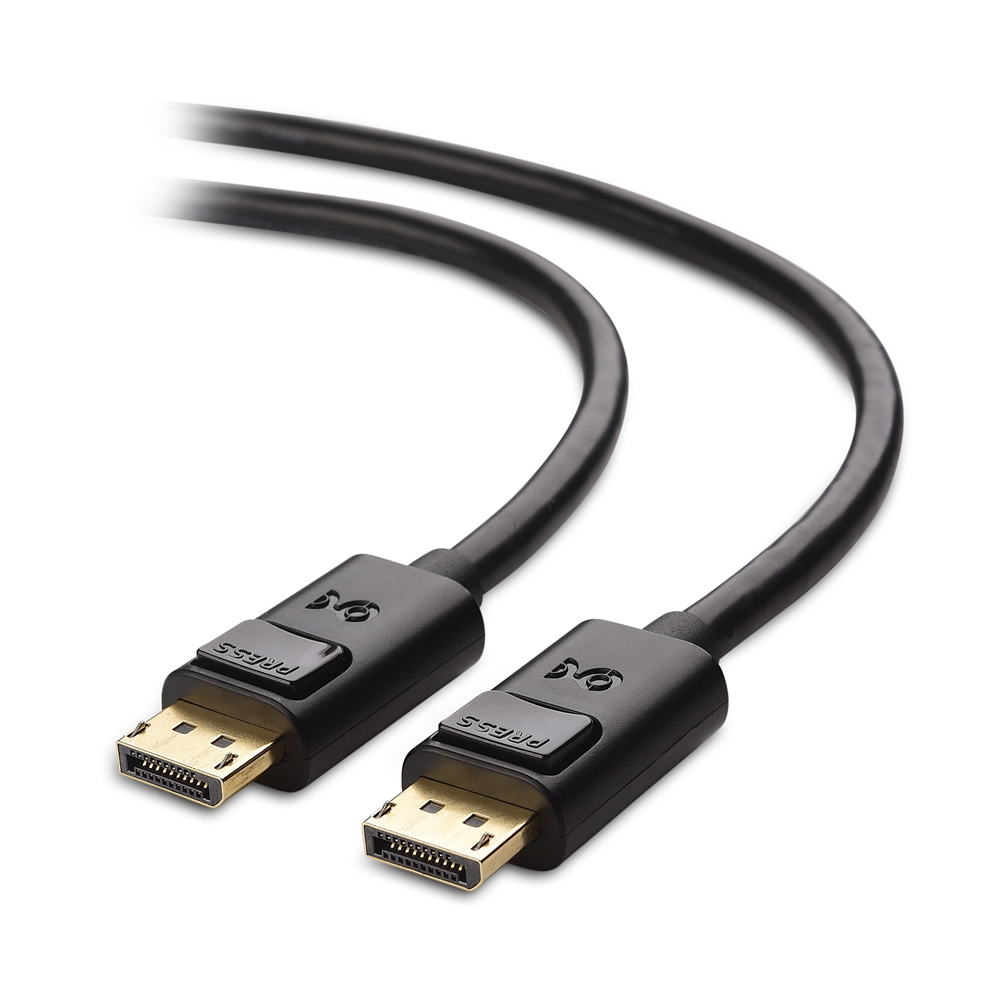
Cable Matters VESA Certified DisplayPort 1.4 Cable 6 Feet
Cable Matters
It depends — Useful for unstable 1440p/240Hz/10-bit HDR or a direct DisplayPort firmware-update connection, but it cannot improve picture quality when the existing cable works reliably.
Use this for a direct PC-to-monitor connection when 1440p, 240Hz, 10-bit HDR is unstable or when updating firmware. It cannot improve picture quality if the existing cable already carries the signal reliably.Available at Amazon(paid link) — opens Amazon in a new tab. Price and availability shown there.
Zeskit Maya 8K 48Gbps Certified Ultra High Speed HDMI Cable 2m
Zeskit
It depends — Useful when HDR or 120Hz handshakes fail on a direct console or HDMI 2.1 PC connection, with thicker construction that is less flexible than an ordinary short HDMI cable.
This is useful for a direct PS5, Xbox Series X, or HDMI 2.1 PC connection when HDR or 120Hz handshakes fail. Its thicker construction is less flexible than an ordinary short HDMI cable.Available at Amazon(paid link) — opens Amazon in a new tab. Price and availability shown there.
Sources
Pages consulted while researching this article. None of these are affiliate links.
- MSI MAG 271QPX QD-OLED E2 User Guide — download-2.msi.com
- MSI: How to Enable the EOTF Boost Function — msi.com
- MSI: Which HDR Mode to Use on Your OLED Monitor — au.msi.com
- MAG 271QPX QD-OLED E2 Firmware History — firmwatch.io
- MSI QD-OLED Gaming Monitor Firmware Update Information — in.msi.com
- MSI Firmware Flashing Procedure via DisplayPort — storage-asset.msi.com
- TechSpot MSI MAG 272QP X50 Review and 271QPX E2 Comparison — techspot.com
- Sina MAG 271QPX QD-OLED E2 Measurements — zhongce.sina.com.cn